
Key Takeaways:
- Step-by-Step Guidance: Receive detailed instructions for starting your project.
- Selection Process: Understand how to choose the right materials and tools.
- Carpentry Techniques: Learn the basic techniques you need for your project.
- Common Mistakes: Gain insight on how to avoid or fix common errors.
- Project Completion: Follow through the process till the final finishing touch.
Carpentry is a rewarding skill that allows you to create beautiful and functional items from wood. As a beginner, the prospect of starting your first project can be both exciting and daunting. This comprehensive guide will provide you with the step-by-step instructions needed to plan and successfully complete a simple yet gratifying carpentry project.
Table of Contents
First Carpentry Project: Understanding The Basics
Before you dive into cutting wood and hammering nails, familiarize yourself with the foundational knowledge every novice woodworker should have. It is essential to become versed in carpentry terms that professionals use.
This understanding will help you comprehend instructions and communicate effectively should you need to seek advice.
Step 1: Selecting Your Project
The initial step in creating your first carpentry project is to decide what you want to build. A good starting point is to select a project that matches your skill level and available tools.
A simple box, a small stool, or a picture frame are great first projects. Once you’ve made your decision, research or purchase carpentry plans that outline the design and dimensions.
Step 2: Choosing Wood and Materials

After deciding on the project, it’s time to pick the right materials. Understanding the different wood types and their properties is crucial.
Some wood is better suited for outdoor projects, while others are preferred for their workability or aesthetic qualities. For beginners, softwoods like pine or cedar can be easier to work with.
Additionally, ensure you have a complete list of all the materials, like nails, screws, and wood glue usage, you’ll need before starting your project.
Step 3: Setting Up Your Workspace
An organized and safe carpentry workspace is vital for any project. Ensure you have enough space to house your project and store all your tools and materials. Also, make sure your workspace is equipped with adequate lighting and ventilation.
Step 4: Assembling the Right Tools

For your first project, you might not have a fully-stocked shop, but you still can complete many projects with just basic carpentry tools.
Commonly used hand tools for a simple project include a hammer, saw, chisels, and screwdrivers. Additionally, power tools for beginners like a drill and a circular saw might also be needed.
It’s critical to learn about tool maintenance and care to keep your tools in top shape for future projects.
Step 5: Measuring and Marking

Accurate measuring and marking are essential in carpentry. Before making any cuts or drilling any holes, triple-check your measurements.
A good carpenter’s rule is to “measure twice, cut once.” This mantra helps to prevent waste and ensures that pieces fit together as intended.
Step 6: Cutting and Shaping the Wood

Learn the basics of mastering the saw and other cutting tools. Start by practicing your cuts on scrap wood. Once you’re comfortable, begin cutting your project pieces according to the plans.
Remember to follow safety protocols and wear protective gear.
For detailed wood shaping, learning to plane wood is an invaluable skill. Planing helps achieve a smooth finish and precise edges, which are crucial for the final assembly of your project.
Step 7: Constructing Woodworking Joints
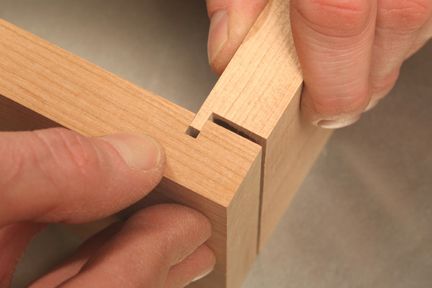
A solid project often relies on strong woodworking joints. There are multiple joint options, from simple butt joints to more complicated dovetails.
For beginners, using screws or nails can be an effective and easier method for joining wood. You can also modern adhesive, you can also visit wood glue usage for additional tips on adequately applying wood glue for a tighter bond.
Step 8: Assembling the Project

During assembly, ensure everything fits together snugly before permanently affixing pieces. Double-check alignments and make any necessary adjustments.
Use clamps to keep pieces in place while securing them, and refer to our guide on carpentry clamps uses for help on how to utilize different types of clamps.
Step 9: Sanding and Finishing
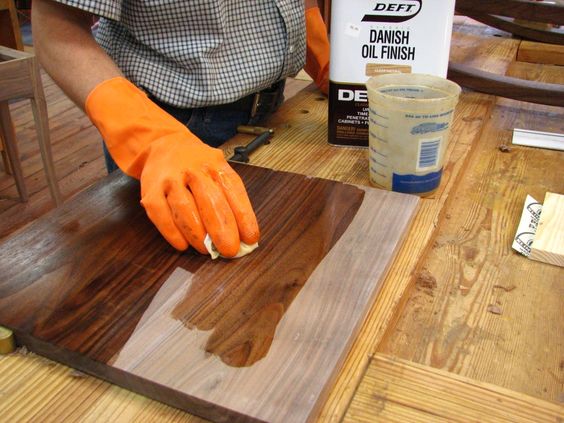
No carpentry project is complete without a proper finish. Sanding your project smooths out rough edges and prepares the surface for basic finishing techniques. Sand with progressively finer grits until you achieve a smooth surface.
When the sanding is completed, you can paint, stain, or seal your wood based on your preference and the intended use of the item. Beginners wood staining tips can help you achieve a professional-looking finish even on your first try.
Step 10: Testing and Making Adjustments

Once your project is assembled and finished, it’s important to test its functionality. Open drawers, sit on chairs, and put weight on shelves to make sure everything holds.
If something isn’t quite right, refer to fixing woodworking mistakes to learn how to make corrections without starting over.
Step 11: Enjoying Your Handcrafted Piece

Take a step back and appreciate your efforts. You’ve transformed raw materials into something useful and perhaps even beautiful. More importantly, you’ve gained valuable experience and skills that will serve you well in future projects.
Mistakes certainly happen, especially when you’re learning. However, with resources on fixing woodworking mistakes, you’ll know how to tackle them confidently.
Learning from Your Experience
Take notes of what worked well and what didn’t for your next project. Maybe a particular step took longer than expected, or you found a certain joint tricky. Assess and refine your process each time you work on a new project.
As you grow in your carpentry journey, you’ll learn to customize projects, develop your unique style, and perhaps even invent time-saving techniques.
Continued Learning and Development
As you continue to engage in more projects, expanding your carpentry knowledge becomes increasingly important. You’ll find yourself delving into more advanced subjects like carpentry joinery for beginners and exploring more sophisticated tools and machinery. Embrace this as part of the joy of woodworking – there is always more to learn and master.
Remember to always adhere to workshop safety practices for your safety and the longevity of your craft. And, as you gain more experience in woodworking, you might also consider looking into a carpentry apprenticeship to take your skills to a professional level.

